Spiral Abyss Floor 11 for Version 6.0 Luna I Guide
◆ New: 6.0 Luna I, 2025 Anniversary, 6.0 Codes
◆ Phase 1: Lauma, Aino, Nahida, 6.0 Chronicled Wish
◆ Nod-Krai: Lunoculus, Nod-Krai Quests
◆ Events: To Temper Thyself, Free 5-Star, Clink Clash
◆ Future: Flins, Yelan, 6.1 Luna II, Nefer, UGC
Spiral Abyss Floor 11 is the second to the last floor of the Spiral Abyss domain in Genshin Impact. Check out Spiral Abyss Floor 11 in Version 6.0 Luna I, the best teams and characters, chamber enemies and guides, and the rewards here!
Floor 11 Basic Information
Floor 11 Information and Rewards
| Ley Line Disorder |
• All characters gain a 60% Electro DMG Bonus. • All characters gain a 60% Dendro DMG Bonus. |
|---|---|
| Enemy Level | Lv. 88 - Lv. 92 |
| Star Bounty (All 9★) |
|
| Rewards |
Blessing of the Abyssal Moon: Wavering Moon
| Blessing Effect | |
|---|---|
 When a character triggers Hydro-related reactions, a shockwave will be released at the opponent's position, dealing True DMG. This effect can be triggered once every 3s. |
|
| Blessing Reset | 2025/10/16 04:00 (Server Time) |
Floor 11 Recommended Teams
Best Team Comps For Floor 11
First Half
| Electro-Charged | |||
|---|---|---|---|
|
|
|
Any | Any |
| Lunar-Charged | |||
|
|
|
|
Any |
The first half of Floor 11 benefits the most from AoE teams to handle the large amount of opponents, but utilizing units that can deal Electro and Hydro-related reactions is a priority due to the present Ley Line Disorders.
Take note that Landcruisers can be stopped in its tracks using Electro-Charged or Lunar Charged.
Second Half
| Bloom | |||
|---|---|---|---|
|
|
|
Any | Any |
| Lunar-Bloom | |||
|
|
|
Any | Any |
| Hyperbloom | |||
|
|
|
|
Any |
Floor 11's second half features many Elite opponents but lesser than first half, which means that you're free to use more single-target oriented teams if you so desire, but AoE also has its place in this latter half.
You are free to use any DPS of your choosing, however it remains best to utilize Dendro and Hydro team compositions due to the Blessing and Disorder.
Best Characters to Use
First Half
| Sample Teams | |||
|---|---|---|---|
|
|
|
|
|
|
|
|
|
|
|
|
|
|
|
| Other Recommendations | |||
| Main DPS | |||
| Sub DPS | |||
| Support | |||
| F2P | |||
Second Half
| Sample Teams | |||
|---|---|---|---|
|
|
|
|
|
|
|
|
|
|
|
|
|
|
|
| Other Recommendations | |||
| Main DPS | |||
| Sub DPS | |||
| Support | |||
| F2P | |||
Floor 11 - Chamber 1 Guide
Chamber Information
| Challenge |
Defeat 6 Opponents Defeat 5 Opponents |
||||
|---|---|---|---|---|---|
| Goal |
★ Remaining challenge time longer than 60 sec. ★ Remaining challenge time longer than 180 sec. ★ Remaining challenge time longer than 300 sec. |
||||
Floor 11 - Chamber 1 First Half
Floor 11-1-1 Enemies
| Wave 1 | |||
|---|---|---|---|
|
|
|||
| Wave 2 | |||
|
|
|
||
| Wave 3 | |||
|
|
|||
Floor 11-1-1 Strategy
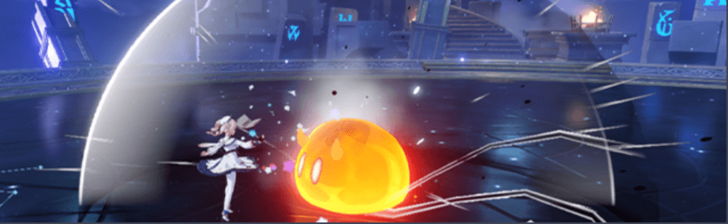
For Floor 11's First Half, the enemies spawn identically at the same spot. It's best to keep them in place so you'll be able to deal the next wave of enemies.
The first wave consists of Nobushi: Jintouban, followed by the Kairagi and then Assault Specialist Mek.
Floor 11 - Chamber 1 Second Half
Floor 11-1-2 Enemies
| Wave 1 | |
|---|---|
|
|
|
| Wave 2 | |
|
|
|
Floor 11-1-2 Strategy
After the Grounded Shrooms, the Vishaps will spawn just behind you from where the Shrooms spawn. It's advisable to be prepared and position yourself relatively close to where the Vishaps will spawn.
Floor 11 - Chamber 2 Guide
Chamber Information
| Challenge |
Defeat 2 Opponents Defeat 6 Opponents |
||||
|---|---|---|---|---|---|
| Goal |
★ Remaining challenge time longer than 60 sec. ★ Remaining challenge time longer than 180 sec. ★ Remaining challenge time longer than 300 sec. |
||||
Floor 11 - Chamber 2 First Half
Floor 11-2-1 Enemies
| Wave 1 | |
|---|---|
|
|
|
Floor 11-2-1 Strategy
This is a straightforward first half. It's advisable to bring a Hydro and Dendro if you're struggling with the Consecrated Beasts to break their shields.
Floor 11 - Chamber 2 Second Half
Floor 11-2-2 Enemies
| Wave 1 | |
|---|---|
|
|
|
| Wave 2 | |
|
|
|
Wave 3 |
|
|
|
Floor 11-2-2 Strategy
The Primal Constructs and Landcruisers will spawn at the same spot, and the Ruin Graders will spawn behind.
Take note of the Scout Landcruiser's shield, it's best to go behind them to deal damage. The Ruin Graders will charge at you if you're too far to them, so it's generally advisable to go near the spot they spawn to save time.
Floor 11 - Chamber 3 Guide
Chamber Information
| Challenge |
Defeat 3 Opponent Defeat 7 Opponents |
||||
|---|---|---|---|---|---|
| Goal |
★Remaining challenge time longer than 180 sec. ★Remaining challenge time longer than 300 sec. ★Remaining challenge time longer than 420 sec. |
||||
Floor 11 - Chamber 3 First Half
Floor 11-3-1 Enemies
| Wave 1 | |
|---|---|
|
|
|
| Wave 2 | |
|
|
|
Floor 11-3-1 Strategy
Two waves of enemies that should not offer much of trouble. As usual, be careful of the Landcruiser's shield as they tend to be difficult if not address quickly.
Floor 11 - Chamber 3 Second Half
Floor 11-3-2 Enemies
| Wave 1 | |
|---|---|
|
|
|
| Wave 2 | |
|
|
|
| Wave 3 | |
|
|
|
Floor 11-3-2 Strategy
For the second half of the third chamber, you will face Ruin enemies. This is a DPS check that incentivizes fast combo restarts and consistent damage.
The enemies will spawn one at a time, so manage your abilities to ensure an uninterrupted supply of damage.
Floor 11 Clear Rewards
Chamber's Bounty
| Chamber 1 |
|
|---|---|
| Chamber 2 |
|
| Chamber 3 |
|
The Chamber's Bounty is the set of rewards you receive simply for clearing a Chamber for the first time. This can only be received once.
Star's Bounty
| 3★ |
|
|---|---|
| 6★ |
|
| 9★ |
|
The Star's Bounty can only be received if you clear the star requirements displayed during the challenge. Each Chamber has 3 stars each with 1 prize for every 3 earned. These can also only be received once.
Genshin Impact Related Guides
Spiral Abyss Guides

Spiral Abyss Floor Guides
| Spiral Abyss Floors | |||
|---|---|---|---|
 Floor 1 Floor 1 |
 Floor 2 Floor 2 |
 Floor 3 Floor 3 |
 Floor 4 Floor 4 |
 Floor 5 Floor 5 |
 Floor 6 Floor 6 |
 Floor 7 Floor 7 |
 Floor 8 Floor 8 |
 Floor 9 Floor 9 |
 Floor 10 Floor 10 |
 Floor 11 Floor 11 |
 Floor 12 Floor 12 |
Comment
i tried everything in floor 11-3-1, using venti, mavuika-furina-xilonen, literally nothing is enough,,, i just cant finish it fast enough to have time for the second chamber. i get they tried to make venti useful, but 60 enemies is WILD
Author

Spiral Abyss Floor 11 for Version 6.0 Luna I Guide
Rankings
Gaming News
![Digimon Story: Time Stranger Review [Demo] | Pokémon Better Watch Out](https://img.game8.co/4276171/b0f48d7890d7802acdf5cbdd9172e282.jpeg/show)


Popular Games

Genshin Impact Walkthrough & Guides Wiki
Hollow Knight: Silksong Walkthrough & Guides Wiki
Umamusume: Pretty Derby Walkthrough & Guides Wiki
Borderlands 4 Walkthrough & Guides Wiki
Wuthering Waves Walkthrough & Guides Wiki
Honkai: Star Rail Walkthrough & Guides Wiki
Pokemon TCG Pocket (PTCGP) Strategies & Guides Wiki
Pokemon Scarlet and Violet (SV) Walkthrough & Guides Wiki
Zenless Zone Zero Walkthrough & Guides Wiki
Clair Obscur: Expedition 33 Walkthrough & Guides Wiki


Recommended Games
Once Human Walkthrough & Guides Wiki
Fire Emblem Heroes (FEH) Walkthrough & Guides Wiki
Yu-Gi-Oh! Master Duel Walkthrough & Guides Wiki
Persona 3 Reload Walkthrough & Guides Wiki
Black Myth: Wukong Walkthrough & Guides Wiki
The Legend of Zelda: Tears of the Kingdom Walkthrough & Guides Wiki
Super Smash Bros. Ultimate Walkthrough & Guides Wiki
Monster Hunter World Walkthrough & Guides Wiki
Diablo 4: Vessel of Hatred Walkthrough & Guides Wiki
Elden Ring Shadow of the Erdtree Walkthrough & Guides Wiki


All rights reserved
Copyright© 2012-2024 HoYoverse — COGNOSPHERE. All Rights Reserved.
The copyrights of videos of games used in our content and other intellectual property rights belong to the provider of the game.
The contents we provide on this site were created personally by members of the Game8 editorial department.
We refuse the right to reuse or repost content taken without our permission such as data or images to other sites.
bro i have skirk-furina-xingqiu-charlotte team for the 11-3-1 and diluc-bennet-xiangling-xianyun for the 11-3-2 bcs i dont have any other fitting char and i cant beat the stupid electro thingg