Hazard Tower (Hazard Zone) Guide for Version 2.6
★ Version 2.6 Phase 2 is out now!
┣ Iuno Debut: Best Build - Materials - Weapon
┣ Rerun: Ciaccona Build - Materials
┣ Main Quest: By Moon's Fated Light
┣ Area: Sanguis Plateaus - 2.6 Sonance Caskets
┗ Events: Tidal Defense Sim, Marks of the Wild
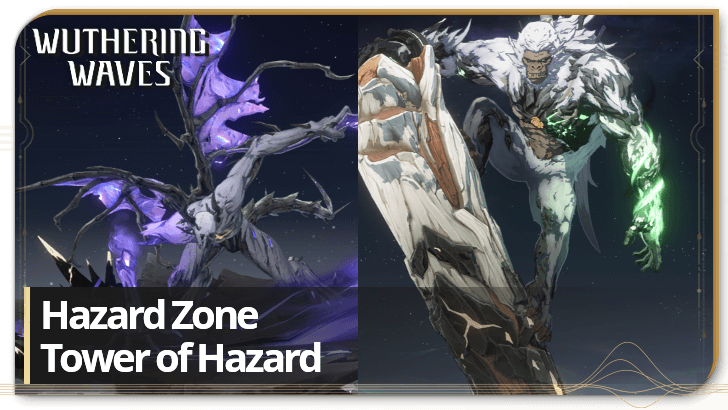
Check out how to beat the Hazard Zone's Hazard Tower in Wuthering Waves Version 2.6. We have the best characters and stage guides for each floor here!
List of Contents
Hazard Tower Character Vigor Plan
Suggested Configuration
Team 1
| Floor | Character 1 | Character 2 | Character 3 |
|---|---|---|---|
| 1 | DPS | Sub-DPS | Support |
| 2 | DPS | Sub-DPS | Support |
Team 2
| Floor | Character 1 | Character 2 | Character 3 |
|---|---|---|---|
| 3 | DPS | Sub-DPS | Support |
| 4 | DPS | Sub-DPS | Support |
For the Hazard Tower, and considering it is the hardest of the three towers, we suggest going for a full team of your strongest characters.
If possible, make sure the buffs provided by the Tower works in favor with your team but if not, you may use any team that have neither increased RES from enemies nor the tower. In addition, you should always have your most powerful support here so reserve your Shorekeeper and Verina here!
Floors 3 and 4 Require a New Team
To fully clear all four floors of the Hazard Tower, you will need atleast 2 teams since each floor consumes 5 Vigors each. Floor 3 and 4 were added in Version 2.6.
2.6 Banners, Release Date, and Summary
Hazard Zone Hazard Tower Floor 1
Hazard Tower 1 Details
| Interference | |
|---|---|
| Enemies' Havoc RES and Aero RES are reduced by 10%. Enemies' Glacio RES and Spectro RES are increased by 10%. Casting Resonance Liberation causes a blast that deals Aero DMG equal to 120% of the casters' Max HP, triggered once every 5s. Targets with Aero Erosion have their DEF reduced by 30%. |
|
| Objectives | |
| Enemies (Lv. 100) |
|
| Enemy RES | |
| Vigor Cost | 5 Vigor |
Best Characters and Teams
Best Team Composition
For the Sub-DPS and Support options, the top option is the best one to use.
| Main DPS | Sub DPS | Support |
|---|---|---|
|
|
||
|
|
||
|
|
||
|
|
Hazard Tower's current buff revolves around using Havoc and Aero Teams with additional focus on teams that scales off HP and uses Aero Erosion. Only one team can maximize this buff: the Cartethyia team. Cartethyia is the only Main DPS that scales off of HP and procs Aero Erosion so far, so using her team would make this tower a cakewalk.
In any case, you make also use other teams that can make use of the Havoc or Aero DMG buffs like Jiyan, Phrolova, or Camellya. Do note that they won't be as effective as Cartethyia's team mostly because they will miss out on the major buffs for HP and the DEF reduction from Aero Erosion.
Break Fallacy's Vibration Quickly
Fallacy of No Return will go berserk when its HP reaches around the halfway mark, making it more agile and less susceptible to crowd control effects. Before it turns crazy though, it will start charging up so make sure to shred its Vibration Gauge quickly before it goes berserk and fly away.
Hazard Zone Hazard Tower Floor 2
Hazard Tower 2 Details
| Interference | |
|---|---|
| Enemies' Havoc RES and Aero RES are reduced by 10%. Enemies' Glacio RES and Spectro RES are increased by 10%. Casting Resonance Liberation causes a blast that deals Aero DMG equal to 120% of the casters' Max HP, triggered once every 5s. Targets with Aero Erosion have their DEF reduced by 30%. |
|
| Objectives | |
| Enemies (Lv. 100) |
|
| Enemy RES | |
| Vigor Cost | 5 Vigor |
Best Characters and Teams
Best Team Composition
For the Sub-DPS and Support options, the top option is the best one to use.
| Main DPS | Sub DPS | Support |
|---|---|---|
|
|
||
|
|
||
|
|
||
|
|
Continuing on with the second floor, we recommend using the same team and consume all the Vigor left for this team. This floor is composed of three waves, with a final Sentry Construct boss waiting for you in the third wave.
Like the first floor, the interference prefers teams that has a main DPS that scales off HP and revolves around Aero Erosion. The best team to use is the Cartethyia team, which will make this floor a cakewalk.
Quickly Dispatch the First Two Waves
The main purpose of the first two waves is to stall and waste time, so make sure to dispatch them quickly. Avoid all their attacks and try to group them in the middle. The Lumiscale Construct will always start with its scissor attacks which is quite easy to avoid.
Prioritize Parrying Sentry's Aerial Swipe
The Sentry Construct will start flying as soon as it spawns, but its first attack is always a swipe attack with a parry opportunity.
Be sure to parry the attack to send the Sentry crashing down. This will save you a lot of time and will relegate the Sentry to using ground attacks which are a lot more manageable.
Hazard Zone Hazard Tower Floor 3
Hazard Tower 3 Details
| Interference | |
|---|---|
| 60s after the battle starts, Resonators' total DMG is increased by 5%. After that, their total DMG is increased by 5% every 5s, up to 60%. Gain 30% Heavy Attack DMG Bonus. Casting Resonance Liberation grants a Shield of 3,000 HP to Resonators, triggered once every 4s. Shielded Resonators take 10% less DMG and their total DMG is increased by 16% for 6s, stacking up to 3 times. Retriggering the effect resets its duration. Enemies take 10% less DMG. This effect is ignored when Resonators are Shielded. |
|
| Objectives | |
| Enemies (Lv. 100) |
|
| Enemy RES | |
| Vigor Cost | 5 Vigor |
Best Characters and Teams
Best Team Compositions
For the Sub-DPS and Support options, the top option is the best one to use.
| Main DPS | Sub DPS | Support |
|---|---|---|
|
|
||
|
|
Floor 3 is a new addition from Version 2.6 which would require you to finish the first two floors of the Hazard Tower. Floor 3 shares the same interference with Floor 4 and they both consume 5 Vigor. This means, you will need an entirely new team from the first two floors.
Thankfully, the interference is fairly general because there is a way for you to actually maintain the Shield and make use of most of the effect. This makes any team useable for the last two floors as long as you don't get hit and expend the shield.
Augusta Team is Best
However, there is a team that will benefit from the interference greatly because they create shields via their kit: Augusta's team. Note that Augusta creates shields everytime she deal damage so it's extremely easy to maintain the shield requirement of the interference. What more, Augusta scales off Heavy Attack DMG so she gets the unconditional Heavy Attack DMG bonus from the interference in addition to everything else.
Jiyan as a Second Choice
Noting the unconditional 30% Heavy Attack DMG Bonus, Jiyan's team is also a plausible option. Though he won't be able to consistently maintain the shield like Augusta, he can easily just avoid attacks to not expend the shield created from his Liberation.
Hazard Zone Hazard Tower Floor 4
Hazard Tower 4 Details
| Interference | |
|---|---|
| 60s after the battle starts, Resonators' total DMG is increased by 5%. After that, their total DMG is increased by 5% every 5s, up to 60%. Gain 30% Heavy Attack DMG Bonus. Casting Resonance Liberation grants a Shield of 3,000 HP to Resonators, triggered once every 4s. Shielded Resonators take 10% less DMG and their total DMG is increased by 16% for 6s, stacking up to 3 times. Retriggering the effect resets its duration. Enemies take 10% less DMG. This effect is ignored when Resonators are Shielded. |
|
| Objectives | |
| Enemies (Lv. 100) |
|
| Enemy RES | |
| Vigor Cost | 5 Vigor |
Best Characters and Teams
Best Team Compositions
For the Sub-DPS and Support options, the top option is the best one to use.
| Main DPS | Sub DPS | Support |
|---|---|---|
|
|
||
|
|
Floor 4 has similar interference with Floor 3 so we opted to use the same team to take the two floors on. This final floor is by far the most challenging, as it will pit you against two Level 100 Bosses. Be sure to dispatch them as quickly as possible and don't miss anything that may mess your rotation.
Augusta Team is Best
Augusta's team remains to be the best one to use here. Augusta creates shields everytime she deal damage so it's extremely easy to maintain the shield requirement of the interference. What more, Augusta scales off Heavy Attack DMG so she gets the unconditional bonus from the interference in addition to everything else.
Jiyan as a Second Choice
Noting the unconditional 30% Heavy Attack DMG Bonus, Jiyan's team is also a plausible option. Since he won't be able to consistently maintain the shield like Augusta, make sure avoid attacks to not expend the shield created from his Liberation due to the interference effect.
Wuthering Waves Related Guides
Hazard Zone
| All Hazard Zone Towers | ||
|---|---|---|
| Hazard Tower will reset on: October 13, 2025 |
||
Hazard Zone refreshes every 28 days.
All Permanent Zones
Overdrive Zone
| All Overdrive Zone Towers | ||
|---|---|---|
Experimental Zone
| All Experimental Zone Towers | ||
|---|---|---|
Stable Zone
| Stable Zone Tower | ||
|---|---|---|
Comment
Why is Shorekeeper recommended when Verina is better suited for Jinhsi? She's suited for quickswap characters, not a normal rotation
Author

Hazard Tower (Hazard Zone) Guide for Version 2.6
Rankings
- We could not find the message board you were looking for.
Gaming News
![Digimon Story: Time Stranger Review [Demo] | Pokémon Better Watch Out](https://img.game8.co/4276171/b0f48d7890d7802acdf5cbdd9172e282.jpeg/show)


Popular Games

Genshin Impact Walkthrough & Guides Wiki
Hollow Knight: Silksong Walkthrough & Guides Wiki
Umamusume: Pretty Derby Walkthrough & Guides Wiki
Borderlands 4 Walkthrough & Guides Wiki
Wuthering Waves Walkthrough & Guides Wiki
Honkai: Star Rail Walkthrough & Guides Wiki
Pokemon TCG Pocket (PTCGP) Strategies & Guides Wiki
Pokemon Scarlet and Violet (SV) Walkthrough & Guides Wiki
Zenless Zone Zero Walkthrough & Guides Wiki
Clair Obscur: Expedition 33 Walkthrough & Guides Wiki


Recommended Games
Fire Emblem Heroes (FEH) Walkthrough & Guides Wiki
Yu-Gi-Oh! Master Duel Walkthrough & Guides Wiki
Persona 3 Reload Walkthrough & Guides Wiki
Once Human Walkthrough & Guides Wiki
Black Myth: Wukong Walkthrough & Guides Wiki
The Legend of Zelda: Tears of the Kingdom Walkthrough & Guides Wiki
Super Smash Bros. Ultimate Walkthrough & Guides Wiki
Monster Hunter World Walkthrough & Guides Wiki
Diablo 4: Vessel of Hatred Walkthrough & Guides Wiki
Elden Ring Shadow of the Erdtree Walkthrough & Guides Wiki


All rights reserved
Copyright© 2024-2025 Kuro Games. All Rights Reserved.
The copyrights of videos of games used in our content and other intellectual property rights belong to the provider of the game.
The contents we provide on this site were created personally by members of the Game8 editorial department.
We refuse the right to reuse or repost content taken without our permission such as data or images to other sites.
Another trash ass modifier that doesn't work at all, no echo skill that i use from any character even Cantarella wont trigger the echo buff for me at all in hazard tower. So tired of hazard tower being an over tuned bs mode that has modifiers that only work for some people.