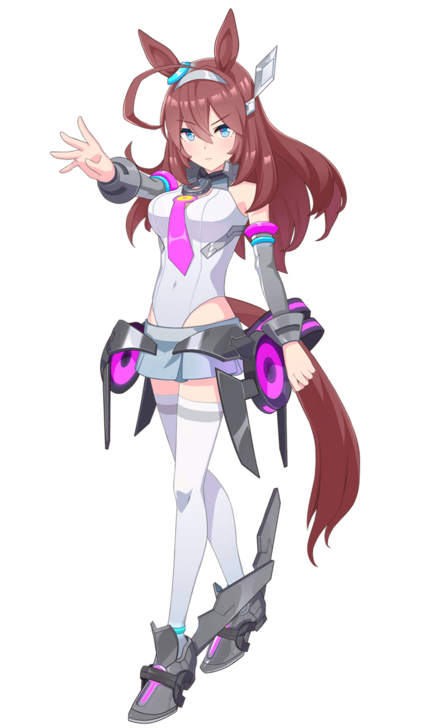
Mihono Bourbon (MB-19890425) Build Guide and Character Info
★ Best Characters | Best Support | Best Skills
┗ New Character: Seiun Sky | Hishi Amazon
┗ New Cards: Bamboo Memory | Shinko Windy
★ Event Choice Checker
★ Support Comparison Tool
★ Friend ID Sharing Board
This is a build guide for Mihono Bourbon (MB-19890425) in Umamusume: Pretty Derby. Find out how to build Mihono Bourbon, her preferred tracks, distances, and style, as well as her basic character information, here!
| Mihono Bourbon Related Guides | |
|---|---|
|
|
|
Mihono Bourbon (MB-19890425) Character Info
Mihono Bourbon (MB-19890425) Stats
| Mihono Bourbon (MB-19890425) | |||||||||||||||||||
|---|---|---|---|---|---|---|---|---|---|---|---|---|---|---|---|---|---|---|---|

|
|||||||||||||||||||
| Overall | Ease | T. Trials | CM | ||||||||||||||||
|
|
|
|
| ||||||||||||||||
| Track Aptitude | |||||||||||||||||||
| Turf: A | Dirt: G | ||||||||||||||||||
| Distance Aptitude | |||||||||||||||||||
| Sprint: C | Mile: B | Med: A | Long: B | ||||||||||||||||
| Pace Aptitude | |||||||||||||||||||
| Front: A | Pace: E | Late: G | End: G | ||||||||||||||||
| Stat Growth | |||||||||||||||||||
| SPD: 0% | STA: 20% | POW: 10% | GUT: 0% | WIT: 0% | |||||||||||||||
Mihono Bourbon (MB-19890425) Unique Skill
|
|
Increase velocity when positioned toward the front after making it to the final straight without faltering. |
|---|
Mihono Bourbon (MB-19890425) Innate Skills
| All Innate Skills |
|---|
Mihono Bourbon (MB-19890425) Potential Skills
| Skill Per Potential Level |
|---|
| Potential 2: Potential 3: Potential 4: Potential 5: |
Mihono Bourbon (MB-19890425) Career Training Tips
| Training Tips |
|---|
|
|
Run Her as Front Runner
Mihono Bourbon is an Umamusume who has an A aptitude on the Front Runner running style, and she also has access to Front Runner skills like Taking the Lead and skills that activate when she is in the lead like Trackblazer.
As such, run Mihono Bourbon as a Front Runner to fully maximize her potential.
Max Out Her Potential When Able
To increase the amount of skills you immediately have access to on Mihono Bourbon, it is recommended to max out her Potential level. However, if you do not have the Monies or materials to do so, try to unlock Potential Level 3 for the speed skill, Taking the Lead.
Improve Her Long Aptitude
Mihono Bourbon has three Long races in her career, so it is ideal to improve her Long Aptitude to A using Legacy Sparks to make sure she performs well in them. You can also increase her Mile Aptitude to A to do well in her first two career races after her debut, but this is not necessary.
Legacy and Sparks Guide: Inheritance Explained
Mihono Bourbon (MB-19890425) Build
Recommended Stats
| 900 | 900 | 600 | 400 | 400 |
As a Medium race runner who prefers staying in the Front, Mihono Bourbon performs well with high Speed and Stamina, as well as some Power for better acceleration and overtaking. It's also ideal to have a high enough wit to help activate skills and prevent the Rushed status that can affect her performance and the activation of her Unique Skill.
It is important to note that if you cannot reach the stats recommended above, you can instead aim for a similar stat distribution. You can then compensate for the missing stats using skills. Additionally, if you are only planning on clearing a career run with Mihono Bourbon then you can aim for lower stat numbers, as the stats above are a baseline for Team Trials.
Recommended Support Cards
 Vodka (Wild Rider)
 Silence Suzuka (Beyond This Shining Moment)
 Twin Turbo (Turbo Booooost!)
 Sweep Tosho (Lamplit Training of a Witch-to-be)
 Kitasan Black (Fire at My Heels)
 Super Creek (Piece of Mind)
For Support cards, we recommend a 4 Speed, 1 Power, 1 Stamina deck. Mihono Bourbon needs Stamina and Power to complement her Speed, as she prefers being the Front Runner in Medium races. You can choose to replace one of the Speed cards with either a Stamina or Power card if you find your stats lacking.
Not only do these cards help train Mihono Bourbon's preferred stats (especially with Rainbow/Friendship Training), but they can give you strong skills such as Swinging Maestro and Homestretch Haste.
Alternate SR Support Cards
| Alternate Cards | ||
|---|---|---|
 Mayano Top Gun (Cute + Cute = ?) Mayano Top Gun (Cute + Cute = ?) Rarity: SR Type: Stamina Great general-purpose Stamina card |
 Agnes Tachyon (Experimental Studies on Subject A) Agnes Tachyon (Experimental Studies on Subject A) Rarity: SR Type: Wit Great Medium speed skills and debuffs |
 Marvelous Sunday (A Marvelous ☆ Plan) Marvelous Sunday (A Marvelous ☆ Plan) Rarity: SR Type: Wit General-purpose speed skills and debuffs |
If you do not have the cards from the recommended deck, you can replace them with a similar stat card that provides skills that Mihono Bourbon needs. These can be SSR cards, or even SR cards. Above are some of the SR cards that you can use in place of SSR Support cards.
Recommended Legacy Sparks
| Recommended | |
|---|---|
| 9★ Stamina 9★ Power |
|
| 3★ Front 3★ Mile 3★ Long |
Try to get Stamina and Power sparks when picking legacies for Mihono Bourbon as she needs these stats quite a lot. For race length sparks, get both Mile and Long sparks, as she has a combination of Mile, Medium, and Long races in her career. Alternatively, you can opt to just get Medium sparks and make up for the B rating in Mile and Long using raw stats.
For running style spaks, Front Runner sparks are the best as these will help push it up from A to S.
You can use either your own Veterans, or borrow the ones from your friends. If you do not have Veterans with full sparks, you can go with whatever you have access to.
Legacy Compatibility
| Great | |
|---|---|
| Good |
When picking Legacies, try to select compatible legacies, as they increase the chance of inheriting additional sparks during the Inheritance events. This is not required, but is highly recommended.
If you do not have access to fully compatible legacies, it is enough to ensure that you have at least good compatibility with your selected legacies.
Recommended Skills
| Recommended Skills | ||
|---|---|---|
 Swinging Maestro Swinging Maestro
|
 Focus Focus
|
 Final Push Final Push
|
|
Straightaway Acceleration
|
 Homestretch Haste Homestretch Haste
|
Front Runner Straightaways ◯
|
When getting skills, it is ideal to get skills that help Mihono Bourbon stay at the front. Focus on getting easy to activate Speed skills, followed by one or two recovery skills. A good recovery skill is Swinging Maestro thanks to its easy activation requirement.
For Speed skills, try to get Homestretch Haste and Straightaway Acceleration, as both help in keeping Mihono Bourbon at the front. Other good skills include Final Push and Front Runner Straightaways. Finally, get Focus to help in the activation of Mihono Bourbon's Unique Skill.
If you cannot get the recommended skills, you can replace them with similar skills that you have access to. You will just need to make sure that Mihono Bourbon can activate said skills in a race.
Mihono Bourbon (MB-19890425) Events
Smiles Are Contagious
| Choice | Outcome |
|---|---|
|
Choice 1
(Try giving the baby a smile next time!) |
・ 20 Stamina |
|
Choice 2
(Try showing the baby a bunch of different faces next time!) |
・ 20 Guts |
Trail of Light
| Choice | Outcome |
|---|---|
|
Choice 1
(So that's why you designed it this way...) |
・ 20 Speed |
|
Choice 2
(Your aspirations really shine through!) |
・ 20 Power |
Who to Count On
| Choice | Outcome |
|---|---|
|
Choice 1
(Ask a friend to use the machine for you from now on.) |
・ 20 Wit ・ Hot Topic (Random) |
|
Choice 2
(Try using soime kind of tool to touch the machine.) |
・ 20 Power ・ Hot Topic (Random) |
Bourbon's Challenge?
| Choice | Outcome |
|---|---|
| Choice 1 | ・ 10 Power |
| Choice 2 | ・ 10 Wit |
Let's Make Memories
| Choice | Outcome |
|---|---|
| Choice 1 | ・ 10 Speed |
| Choice 2 | ・ 10 Guts |
Operation: Dance Fever
| Choice | Outcome |
|---|---|
|
Choice 1
(Dance to something cool!) |
・ 5 Stamina ・ 5 Guts |
|
Choice 2
(Dance to something exciting!) |
・ 5 Stamina ・ 5 Wit |
Operation: Festival Fun
| Choice | Outcome |
|---|---|
|
Choice 1
(Shall we give it a shot, then?) |
・ 10 Power |
|
Choice 2
(Nah, let's try all the other food instead.) |
・ 5 Stamina ・ 5 Guts |
You're Irreplaceable to Me
| Choice | Outcome |
|---|---|
| Choice 1 | ・ 10 Stamina |
| Choice 2 | ・ 10 Speed |
| Choice 3 | ・ 10 Power |
Brutal Training
| Choice | Outcome |
|---|---|
|
Choice 1
(Success)
((But maybe she really wants to exerts her energy...)) |
・ -10 Energy ・ 20 Power ・ 10 Skill Pts |
|
Choice 1
(Fail)
((But maybe she really wants to exerts her energy...)) |
・ -10 Energy ・ 5 Power ・ 5 Skill Pts |
|
Choice 2
((Might be time to get her to stop.)) |
・ 5 Energy |
Dance Lesson (Mihono Bourbon)
| Choice | Outcome |
|---|---|
|
Choice 1
(An idol needs individuality!) |
・ 20 Skill Pts |
|
Choice 2
(An idol needs endurance!) |
・ 10 Stamina |
Operation: Excursion Trouble
| Choice | Outcome |
|---|---|
|
Choice 1
(Let's find that chairlift!) |
・ 10 Stamina ・ 15 Skill Pts |
|
Choice 2
(Let's head to the summit!) |
・ Wet Conditions ◯ Skill Hint |
Operation: Execute Orders
| Choice | Outcome |
|---|---|
|
Choice 1
(Two laps running around the perimeter of the academy!) |
・ 10 Stamina |
|
Choice 2
(One run-through of our strength training regimen!) |
・ 10 Power |
Operation: Extra Classes
| Choice | Outcome |
|---|---|
|
Choice 1
(How about a break!) |
・ 10 Energy ・ 1 Mood |
|
Choice 2
(Why not sew by hand?) |
・ 10 Wit |
The Perfect Dessert
| Choice | Outcome |
|---|---|
|
Choice 1
(...Sorry, but we can't this time.) |
・ 10 Energy ・ 5 Skill Pts |
|
Choice 2
(Let's fill up on desserts!) |
・ 30 Energy ・ 10 Skill Pts |
|
Choice 2
(Let's fill up on desserts!) |
・ 30 Energy ・ 10 Skill Pts |
At Summer Camp (Year 2) (Mihono Bourbon)
| Choice | Outcome |
|---|---|
|
Choice 1
(Try lifting weights until you're at your limit.) |
・ 10 Power |
|
Choice 2
(Try running along the beach until you're at your limit.) |
・ 10 Guts |
New Year's Resolutions (Mihono Bourbon)
| Choice | Outcome |
|---|---|
|
Choice 1
(Let's pound some mochi!) |
・ 10 Power |
|
Choice 2
(Let's watching something funny on TV.) |
・ 20 Energy |
|
Choice 3
(Let's think of a new running technique.) |
・ 20 Skill Pts |
New Year's Shrine Visit (Mihono Bourbon)
| Choice | Outcome |
|---|---|
|
Choice 1
(Let's use today to rest up.) |
・ 30 Energy |
|
Choice 2
(Let's boost our luck wth a fortune slip!) |
・ 5 All Stats |
|
Choice 3
(Let's try learning a new running technique.) |
・ 35 Skill Pts |
Don't Over Do it! (Mihono Bourbon)
| Choice | Outcome |
|---|---|
| Choice 1 |
・ 10 Energy ・ -2 Mood ・ Last trained stat and two other random stat -10 ・ Practice Poor (random) |
| Choice 2 (Success) | ・ Practice Perfect ◯ |
| Choice 2 (Fail) |
・ -3 Mood ・ 3 Random stat -10 ・ Practice Poor |
Extra Training (Mihono Bourbon)
| Choice | Outcome |
|---|---|
|
Choice 1
(Okay.) |
・ -5 Energy ・ Last trained stat +5 ・ 5 Friendship with Director |
|
Choice 2
(I'll go tell her. You should rest.) |
・ 5 Energy |
Get Well Soon! (Mihono Bourbon)
| Choice | Outcome |
|---|---|
| Choice 1 |
・ -1 Mood ・ Last trained stat -5 ・ Practice Poor (random) |
| Choice 2 (Success) | ・ Practice Perfect ◯ |
| Choice 2 (Fail) |
・ -1 Mood ・ Last trained stat -10 ・ Practice Poor (random) |
Defeat (G1) (Mihono Bourbon)
| Choice | Outcome |
|---|---|
| Choice 1 |
・ -25 Energy ・ 25 Skill Pts ・ Random Stat +4 |
| Choice 2 (Success) |
・ -15 Energy ・ 25 Skill Pts ・ Random Stat +4 |
| Choice 2 (Fail) |
・ -35 Energy ・ 25 Skill Pts ・ Random Stat +4 |
Defeat (G2) (Mihono Bourbon)
| Choice | Outcome |
|---|---|
| Choice 1 |
・ -25 Energy ・ 20 Skill Pts ・ Random Stat +3 |
| Choice 2 (Success) |
・ -15 Energy ・ 20 Skill Pts ・ Random Stat +3 |
| Choice 2 (Fail) |
・ -35 Energy ・ 20 Skill Pts ・ Random Stat +3 |
Defeat (G3) (Mihono Bourbon)
| Choice | Outcome |
|---|---|
| Choice 1 |
・ -25 Energy ・ 20 Skill Pts ・ Random Stat +3 |
| Choice 2 (Success) |
・ -15 Energy ・ 20 Skill Pts ・ Random Stat +3 |
| Choice 2 (Fail) |
・ -35 Energy ・ 20 Skill Pts ・ Random Stat +3 |
Defeat (OP and Pre-OP) (Mihono Bourbon)
| Choice | Outcome |
|---|---|
| Choice 1 |
・ -25 Energy ・ 10 Skill Pts |
| Choice 2 (Success) |
・ -15 Energy ・ 10 Skill Pts |
| Choice 2 (Fail) |
・ -35 Energy ・ 10 Skill Pts |
Solid Showing (G1) (Mihono Bourbon)
| Choice | Outcome |
|---|---|
| Choice 1 |
・ -20 Energy ・ 45 Skill Pts ・ Random Stat +8 |
| Choice 2 (Success) |
・ -10 Energy ・ 45 Skill Pts ・ Random Stat +8 |
| Choice 2 (Fail) |
・ -30 Energy ・ 45 Skill Pts ・ Random Stat +8 |
Solid Showing (G2) (Mihono Bourbon)
| Choice | Outcome |
|---|---|
| Choice 1 |
・ -20 Energy ・ 35 Skill Pts ・ Random Stat +5 |
| Choice 2 (Success) |
・ -10 Energy ・ 35 Skill Pts ・ Random Stat +5 |
| Choice 2 (Fail) |
・ -30 Energy ・ 35 Skill Pts ・ Random Stat +5 |
Solid Showing (G3) (Mihono Bourbon)
| Choice | Outcome |
|---|---|
| Choice 1 |
・ -20 Energy ・ 35 Skill Pts ・ Random Stat +5 |
| Choice 2 (Success) |
・ -10 Energy ・ 35 Skill Pts ・ Random Stat +5 |
| Choice 2 (Fail) |
・ -30 Energy ・ 35 Skill Pts ・ Random Stat +5 |
Solid Showing (OP and Pre-OP) (Mihono Bourbon)
| Choice | Outcome |
|---|---|
| Choice 1 |
・ -20 Energy ・ 30 Skill Pts ・ Random Stat +3 |
| Choice 2 (Success) |
・ -10 Energy ・ 30 Skill Pts ・ Random Stat +3 |
| Choice 2 (Fail) |
・ -30 Energy ・ 30 Skill Pts ・ Random Stat +3 |
Victory! (G1) (Mihono Bourbon)
| Choice | Outcome |
|---|---|
| Choice 1 |
・ -15 Energy ・ 45 Skill Pts ・ Random Stat +10 |
| Choice 2 (Success) |
・ -5 Energy ・ 45 Skill Pts ・ Random Stat +10 |
| Choice 2 (Fail) |
・ -20 Energy ・ 45 Skill Pts ・ Random Stat +10 |
Victory! (G2) (Mihono Bourbon)
| Choice | Outcome |
|---|---|
| Choice 1 |
・ -15 Energy ・ 35 Skill Pts ・ Random Stat +8 |
| Choice 2 (Success) |
・ -5 Energy ・ 35 Skill Pts ・ Random Stat +8 |
| Choice 2 (Fail) |
・ -20 Energy ・ 35 Skill Pts ・ Random Stat +8 |
Victory! (G3) (Mihono Bourbon)
| Choice | Outcome |
|---|---|
| Choice 1 |
・ -15 Energy ・ 35 Skill Pts ・ Random Stat +8 |
| Choice 2 (Success) |
・ -5 Energy ・ 35 Skill Pts ・ Random Stat +8 |
| Choice 2 (Fail) |
・ -20 Energy ・ 35 Skill Pts ・ Random Stat +8 |
Victory! (OP and Pre-OP) (Mihono Bourbon)
| Choice | Outcome |
|---|---|
| Choice 1 |
・ -15 Energy ・ 30 Skill Pts ・ Random Stat +5 |
| Choice 2 (Success) |
・ -5 Energy ・ 30 Skill Pts ・ Random Stat +5 |
| Choice 2 (Fail) |
・ -20 Energy ・ 30 Skill Pts ・ Random Stat +5 |
Mihono Bourbon Career Goals
| Goal | Race/Goal |
|---|---|
| Run in Junior Make Debut | Junior Make Debut |
| Place top 5 in Asahi Hai F.S, |
 Asahi Hai Futurity Stakes Asahi Hai Futurity Stakes
(Mile - 1600m) Junior Year Early Dec |
| Place top 5 in Spring S. |
 Spring Stakes Spring Stakes
(Mile - 1800m) Classic Year Late Mar |
| Place top 5 in Satsuki Sho |
 Satsuki Sho Satsuki Sho
(Medium - 2000m) Classic Year Early Apr |
| Place top 5 in Japenese Derby |
 Japanese Derby (Tokyo Yushun) Japanese Derby (Tokyo Yushun)
(Medium - 2400m) Classic Year Late May |
| Place top 3 in Kikuka Sho |
 Kikuka Sho Kikuka Sho
(Long - 3000m) Classic Year Late Oct |
| Place top 3 in Tenno Sho (Spring) |
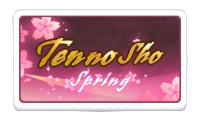 Tenno Sho (Spring) Tenno Sho (Spring)
(Long - 3200m) Senior Year Late Apr |
| Place top 2 in Japan C. |
 Japan Cup Japan Cup
(Medium - 2400m) Senior Year Late Nov |
| Place 1st in Arima Kinen |
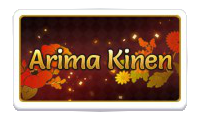 Arima Kinen Arima Kinen
(Long - 2500m) Senior Year Late Dec |
Mihono Bourbon Profile
Basic Information
 Mihono Bourbon Mihono Bourbon"Target acquired. Commencing Operation: Triple Crown." | Voice Actress | Ikumi Hasegawa |
|---|---|---|
| Height | 160cm / 5'2" | |
| Weight | No change | |
| Birthday | Apr 25 | |
| Three Sizes | B 86 | W 54 | H 87 | |
| An Umamusume also known as the "Cyborg." She views the world through the lens of programming and databases, carrying out her objectives in an expressionless and robotic manner. Even so, she is not an emotionless machine—her constant training since her youth has simply resulted in less interactions with people, leading to her current personality. Underneath that robotic shell, she does indeed have feelings. | ||
Costumes
| Uniform | Racewear |
|---|---|
 |
 MB-19890425 MB-19890425 |
Umamusume: Pretty Derby Related Guides

Character Guides
| Height and Weight | Voice Actors | Three Sizes | List of Birthdays |
Characters (Trainees) by Rarity
| 3-Star Characters | 2-Star Characters | 1-Star Characters |
Current Umamusume Characters (Trainees)
 Grass Wonder (Healer)
 El Condor Pasa (Monk)
 Hishi Amazon (Azure Amazon)
 Seiun Sky (Reeling in the Big One)
 Air Groove (Quercus Civilis)
 Mayano Top Gun (Sunlight Bouquet)
 Narita Brian (Maverick)
 Smart Falcon (LOVE☆4EVER)
 Narita Taishin (Nevertheless)
 Curren Chan (Fille Éclair)
 Tokai Teio (Beyond the Horizon)
 Mejiro McQueen (End of the Skies)
 Biwa Hayahide (pf. Winning Equation...)
 T.M. Opera O (O Sole Suo!)
 Rice Shower (Rosy Dreams)
 Symboli Rudolf (Emperor's Path)
 Mejiro McQueen (Frontline Elegance)
 Taiki Shuttle (Wild Frontier)
 Oguri Cap (Starlight Beat)
 Maruzensky (Formula R)
 Tokai Teio (Peak Joy)
 Silence Suzuka (Innocent Silence)
 Special Week (Special Dreamer)
 Super Creek (Murmuring Stream)
 Mayano Top Gun (Scramble Zone)
 Air Groove (Empress Road)
 El Condor Pasa (El Numero 1)
 Grass Wonder (Stone-Piercing Blue)
 Daiwa Scarlet (Peak Blue)
 Vodka (Wild Top Gear)
 Gold Ship (Red Strife)
 King Halo (King of Emeralds)
 Nice Nature (Poinsettia Ribbon)
 Matikane Fukukitaru (Rising Fortune)
 Haru Urara (Bestest Prize)
 Sakura Bakushin O (Blossom in Learning)
 Winning Ticket (Get to Winning!)
 Agnes Tachyon (Tach-nology)
 Mejiro Ryan (Down the Line)
Comment
Advanced variant of this is swapping Air groove SR for Tazuna SSR once you have a good Groundwork Inheriting parent. Then focus is easier to acquire and you can shoot for tail held high procs too: End Build: 1200/750/800/400/400 Swinging Mestro, Trackblazer, Groundwork, Focus, Firm Conditions O, Standard Distance O, Nonstandard Distance O, Tail Held High, Front Runner Straightaways O, Front Runner Corners O, (Try to also get Red Shift/LP 1211-M from inheritance).
Author

Mihono Bourbon (MB-19890425) Build Guide and Character Info
Rankings
- We could not find the message board you were looking for.
Gaming News


Popular Games

Genshin Impact Walkthrough & Guides Wiki
Hollow Knight: Silksong Walkthrough & Guides Wiki
Umamusume: Pretty Derby Walkthrough & Guides Wiki
Borderlands 4 Walkthrough & Guides Wiki
Wuthering Waves Walkthrough & Guides Wiki
Honkai: Star Rail Walkthrough & Guides Wiki
Pokemon TCG Pocket (PTCGP) Strategies & Guides Wiki
Pokemon Scarlet and Violet (SV) Walkthrough & Guides Wiki
Zenless Zone Zero Walkthrough & Guides Wiki
Clair Obscur: Expedition 33 Walkthrough & Guides Wiki


Recommended Games
Once Human Walkthrough & Guides Wiki
Fire Emblem Heroes (FEH) Walkthrough & Guides Wiki
Yu-Gi-Oh! Master Duel Walkthrough & Guides Wiki
Persona 3 Reload Walkthrough & Guides Wiki
Black Myth: Wukong Walkthrough & Guides Wiki
The Legend of Zelda: Tears of the Kingdom Walkthrough & Guides Wiki
Super Smash Bros. Ultimate Walkthrough & Guides Wiki
Monster Hunter World Walkthrough & Guides Wiki
Diablo 4: Vessel of Hatred Walkthrough & Guides Wiki
Elden Ring Shadow of the Erdtree Walkthrough & Guides Wiki


All rights reserved
© Cygames, Inc.
The copyrights of videos of games used in our content and other intellectual property rights belong to the provider of the game.
The contents we provide on this site were created personally by members of the Game8 editorial department.
We refuse the right to reuse or repost content taken without our permission such as data or images to other sites.
FYI, her URA races are Mile, so maxing out Mile aptitude is a must if you want to beat the URA finale.