Best Glyphs
★ Trending: Puzzles | Codes | Jeljin | NG+
☆ Starting out? Check our Beginner's Guide
┗ Combat | Builds | Weapons | Tier List
★ Walkthrough | Good Deeds | Mysteries
┗ Timeloops | Vaults | NPCs | Enemies
☆ Missables | Game Length | Trophies
This is a list of all the best Glyphs you can get and equip in Hell is Us. Find the best Glyphs you can get in the game, as well as our rating for each Glyph on this list.
 Attention! Attention! |
This list is based on early impressions of the game and is subject to change as we continue testing other glyphs. Sign in and select  under the page's title to be notified of any updates! under the page's title to be notified of any updates! |
|---|
| Best Glyphs | All Glyphs |
List of Contents
Best Glyphs
| Rank | Glyphs |
|---|---|
| 1 | Wave of Wrath |
| 2 | Berserk |
| 3 | Overwhelm |
| 4 | Chromatic Shield |
| 5 | Animosity |
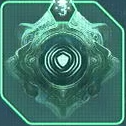
1. Wave of Wrath
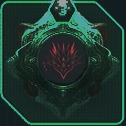 Wave of Wrath - Elite Wave of Wrath - Elite
|
Lymbic Sphere | Rage |
|---|---|---|
| Use Mechanic | Tap | |
| Lock-On Required? | No | |
| Lymbic Energy Cost | 290 | |
| Damage | 1190 | |
| Range | 15m | |
| Effect | ||
| A wave of rageful energy erupts from the ground in front of you and rushes forward, damaging all Lymbic Entities in its path. | ||
The Glyph - Wave of Wrath is great for clearing groups of enemies due to AoE damage it can deal. It's versatile, deals good damage, and can also be used against single enemies.
2. Berserk
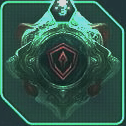 Berserk - Elite Berserk - Elite
|
Lymbic Sphere | Rage |
|---|---|---|
| Use Mechanic | Tap | |
| Lock-On Required? | No | |
| Lymbic Energy Cost | 180 | |
| Stun Immunity | 100% | |
| Duration | 60 sec | |
| Effect | ||
| Enter a state of rageful defiance that wards against getting stunned, staggered, knocked-back, and any other crowd control effect thrown at you. | ||
The Glyph - Berserk is amazing since it allows you to ignore any form of crowd control which lets you dish out your combos with ease. This is versatile and can be used in any fight if needed.
3. Overwhelm
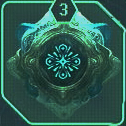 Overwhelm - Elite Overwhelm - Elite
|
Lymbic Sphere | Grief |
|---|---|---|
| Use Mechanic | Charge | |
| Lock-On Required? | No | |
| Lymbic Energy Cost | 300 | |
| Radius | 5m / 7.5m / 10m | |
| Pushback Distance | 20m | |
| Effect | ||
| Grief energy gathers and discharges around you, overwhleming nearby Lymbis Entities and stunning them. | ||
The Glyph - Overwhelm is great for stunning enemies and is most useful when you're fighting Hazes. You can use Overwhelm on the host to stun it and easily burst down the Haze with your other attacks. This also excels in scenarios with many enemies since it can hit multiple targets.
4. Chromatic Shield
 Chromatic Shield - Elite Chromatic Shield - Elite
|
Lymbic Sphere | Neutral |
|---|---|---|
| Use Mechanic | Tap | |
| Lock-On Required? | No | |
| Lymbic Energy Cost | 450 | |
| Duration | 20 sec | |
| Protection | +80% | |
| Effect | ||
| Lymbic energy condenses into a compact sheath, protecting you from incoming damage. | ||
The Glyph - Chromatic Shield is great for tanking damage and letting you freely attack the enemy without worrying about taking damage because of the damage mitigation. This Glyph can also be useful if you need more survivability in a fight.
5. Animosity
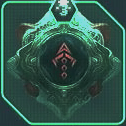 Animosity - Elite Animosity - Elite
|
Lymbic Sphere | Rage |
|---|---|---|
| Use Mechanic | Tap | |
| Lock-On Required? | Yes | |
| Lymbic Energy Cost | 180 | |
| Stun Duration | 4 sec | |
| Effect | ||
| Pure hatred manifests into a lasso that ensnares a targeted Lymbic Entity, vengefully pulling it back into melee range and stunning it in the process. | ||
The Glyph - Animosity is great for pulling far enemies into your attack range. This can be useful if you want to pick off a specific enemy from a group or interrupt a move an enemy is doing from far away.
Hell is Us Related Guides
Best Guides for Beginners
 Beginner's Guide
 Combat Guide
 How To Parry
 How to Riposte
 How to Fast Travel
 How to Heal
 Healing Pulse Explained
 Weapon Upgrades Explained
 Map Guide
 Lymbic Spheres Explained
 Status Effects Explained
 Best Weapon XP Farming Guide
 Lymbic Energy Explained
Meta Guides
 Best Builds Best Builds |
 Best Defensive Gear Best Defensive Gear |
 Best Relics Best Relics |
| Best Glyphs |
 Best Drone Modules Best Drone Modules |
 Best Weapons Tier List Best Weapons Tier List |
End Game Guides
 All Missables All Missables |
 Post Game Guide Post Game Guide |
 Trophy Guide Trophy Guide |
 All Timeloop and Guardian Locations All Timeloop and Guardian Locations |
 Ending Explained Ending Explained |
 Legend of the Phol Guide Legend of the Phol Guide |
Game Information
 How Long to Beat How Long to Beat |
 Demo Details Demo Details |
 All Console and PC Controls All Console and PC Controls |
 Difficulty Settings Explained Difficulty Settings Explained |
 Best Settings Best Settings |
- |
Comment
Author

Best Glyphs
Rankings
- We could not find the message board you were looking for.
Gaming News


Popular Games

Genshin Impact Walkthrough & Guides Wiki
Hollow Knight: Silksong Walkthrough & Guides Wiki
Umamusume: Pretty Derby Walkthrough & Guides Wiki
Borderlands 4 Walkthrough & Guides Wiki
Wuthering Waves Walkthrough & Guides Wiki
Honkai: Star Rail Walkthrough & Guides Wiki
Pokemon TCG Pocket (PTCGP) Strategies & Guides Wiki
Pokemon Scarlet and Violet (SV) Walkthrough & Guides Wiki
Zenless Zone Zero Walkthrough & Guides Wiki
Clair Obscur: Expedition 33 Walkthrough & Guides Wiki


Recommended Games
Once Human Walkthrough & Guides Wiki
Fire Emblem Heroes (FEH) Walkthrough & Guides Wiki
Yu-Gi-Oh! Master Duel Walkthrough & Guides Wiki
Persona 3 Reload Walkthrough & Guides Wiki
Black Myth: Wukong Walkthrough & Guides Wiki
The Legend of Zelda: Tears of the Kingdom Walkthrough & Guides Wiki
Super Smash Bros. Ultimate Walkthrough & Guides Wiki
Monster Hunter World Walkthrough & Guides Wiki
Diablo 4: Vessel of Hatred Walkthrough & Guides Wiki
Elden Ring Shadow of the Erdtree Walkthrough & Guides Wiki


All rights reserved
©2025 – Nacon
The copyrights of videos of games used in our content and other intellectual property rights belong to the provider of the game.
The contents we provide on this site were created personally by members of the Game8 editorial department.
We refuse the right to reuse or repost content taken without our permission such as data or images to other sites.