A Call for Help Walkthrough
★ 8 SHiFT Codes as of September 2025
☆ Black Market Location
★ Elemental Weakness Chart
☆ Legendary Weapons
★ Builds: Vex | Amon | Rafa | Harlowe
☆ How to Respec Skill Tree

This is a walkthrough for the A Call for Help side mission in Borderlands 4. Follow this guide to locate all of Limos' transponders and identify his killer.
List of Contents
How to Unlock A Call for Help
Complete Main Mission His Vile Sanctum and Side Mission Meat is Murder
A Call for Help requires you to have finished the main mission His Vile Sanctum and the side mission Meat is Murder.
Once both missions are done, talk to Arwa at Belton's Bore standing by a board.
A Call for Help Walkthrough
Find Limos
| # | Walkthrough |
|---|---|
| 1 | Talk to Arwa at Belton's Bore and follow her to scan her transponder. |
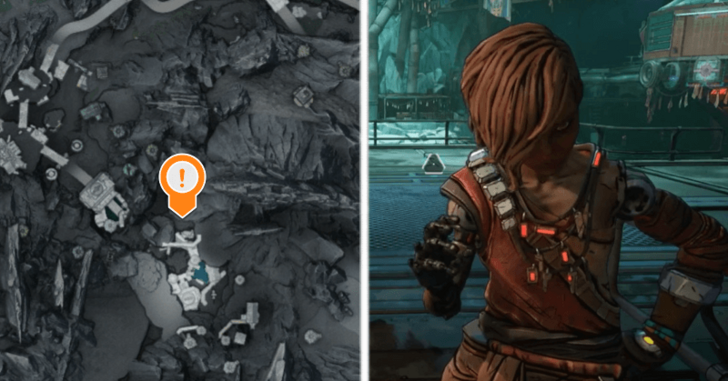
| 2 | 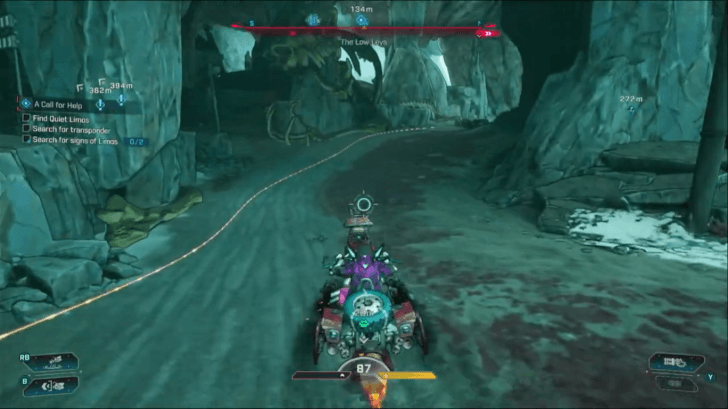 Go to the marked location to find Quiet Limos' transponder in a large cave. Optionally, you may search for signs of Limos: ・Bloody footprints under the large skeleton ・Mangler corpse at the center of the cave |
| 3 |  At the upper section of the cave, kill the mangler to obtain Limos' transponder. |
| 4 | Search for the second transponder at the next marked location, at Checkpoint Taupe. Kill the Order forces at the entrance. |
| 5 | 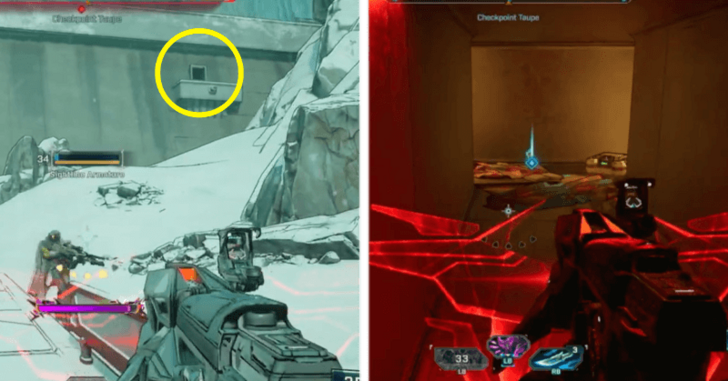 To the right side of the entrance, you will see an open vent on the wall. Enter the vent and follow the path straight (going left takes you to an exit point) to retrieve Limos' transponder. |
| 6 | Go to the marked location to find the third transponder at Shadowed Reverie. Kill the Order forces then search the base. |
| 7 | 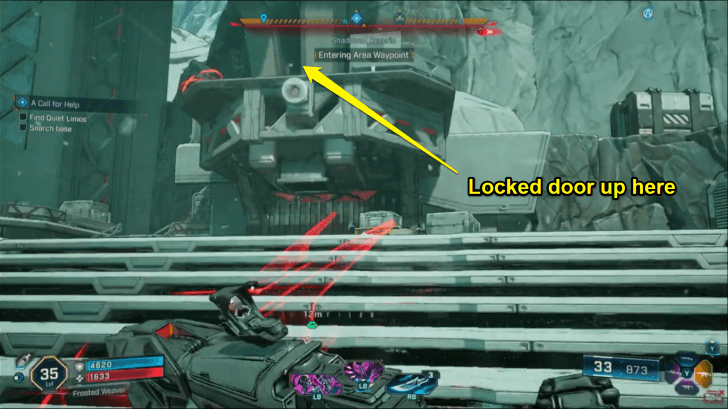 Find the locked door. Defend ECHO-4 from enemies while it unlocks the door. Once all enemies are killed and the door is open, take the transponder inside the room. |
| 8 | 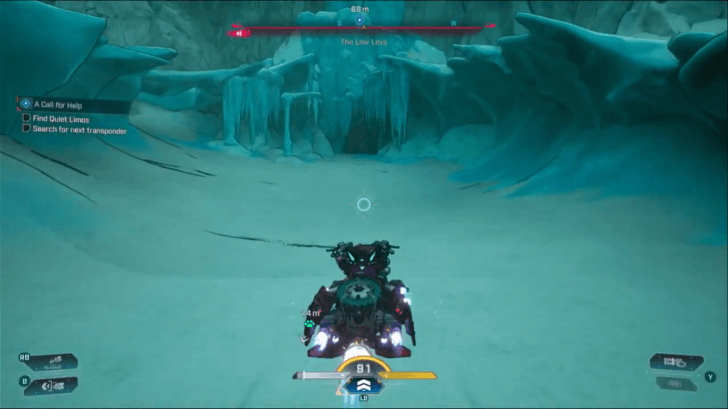 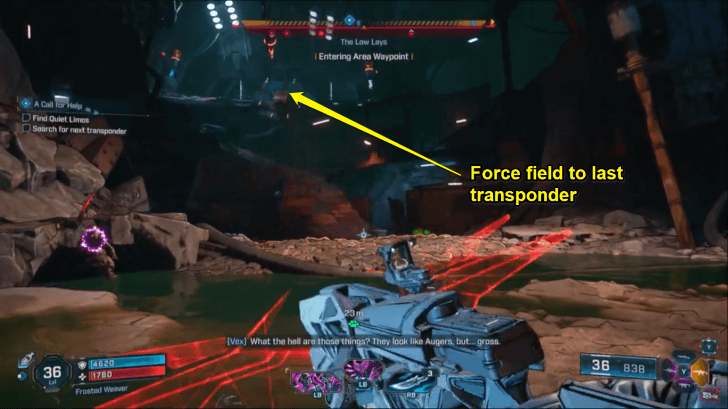 Look for the last transponder in a cave at Crawler's Folly. Enter the cave and follow the path until you reach a blue force field. |
| 9 |  To deactivate the force field, destroy the marked pressure plates with ground slams. Then, shoot the heads. |
| 10 | With the barrier down, enter the room and approach Limos' corpse. Get the transponder on the table beside it, then examine the decapitated head. You may optionally search the area by interacting with the two items on the table. |
Save Arwa
| # | Walkthrough |
|---|---|
| 1 | 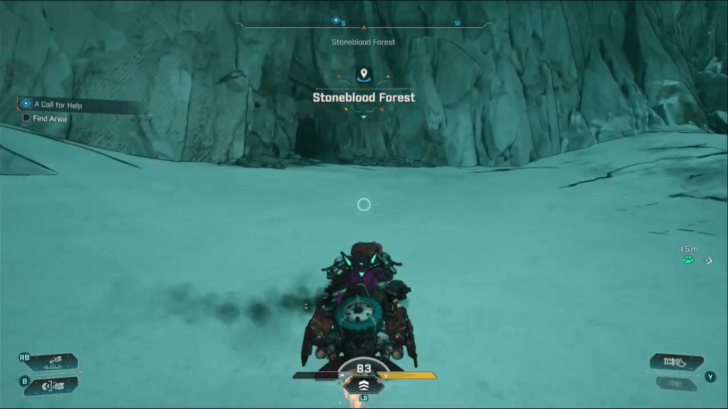 Find Arwa in another cave in the marked location at Stoneblood Forest. Kill the creeps and deranged Augers inside the cave. Afterwards, you will see that the path to Arwa is blocked by a force field. |
| 2 | 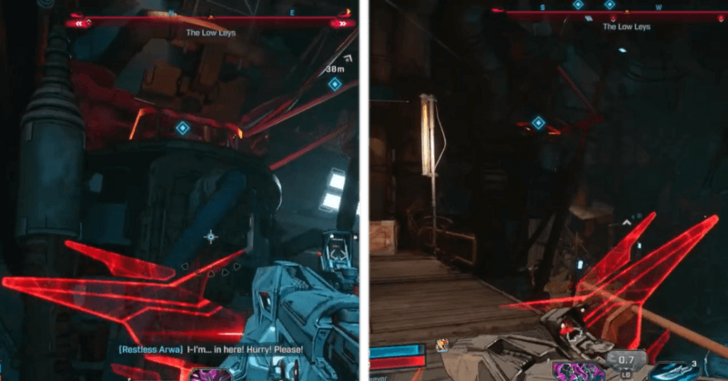 Climb the platforms to reach the pressure plates. Like before, ground slam the pressure plates to disable the force field. |
| 3 | After disabling the force field, find and talk to Arwa. |
Find the Killer
| # | Walkthrough |
|---|---|
| 1 | 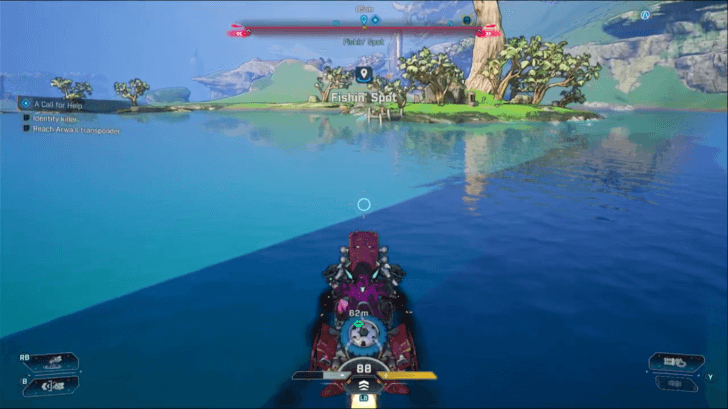 Find Arwa’s transponder at Fishin' Spot by Plungeford in The Fadefields. Drop down into a hatch on the grass to land in a bunker. |
| 2 | 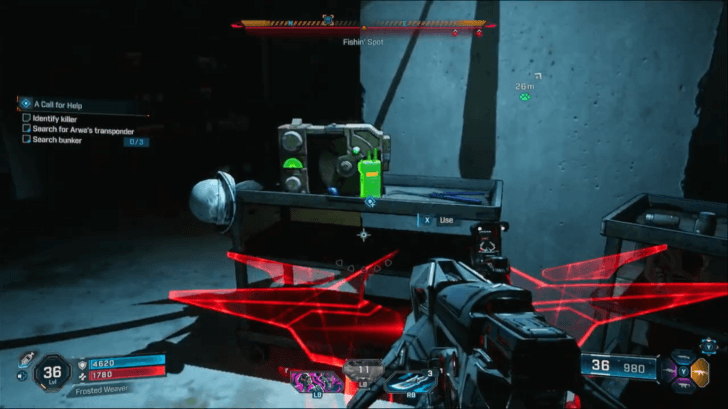 Once you drop into the bunker, you will immediately find Arwa’s transponder on a table near a radio. You may optionally search the bunker by interacting with the froyo cups by the skulls, the froyo machine, and the projector. |
| 3 | 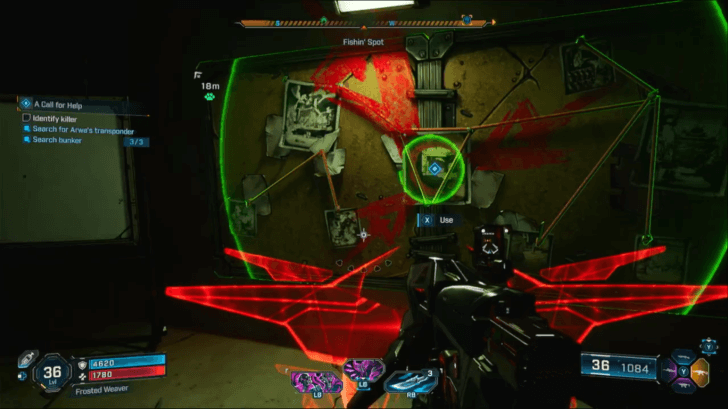 Proceed to the next room and interact with the board on the wall to identify the killer. |
| 4 | 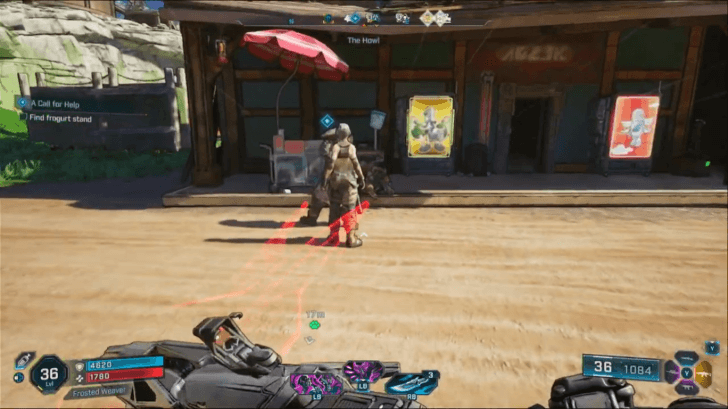 Go to the frogurt stand at The Howl, then run up to the barn ahead to search for the Froyo Guy. |
| 5 |  There, interact with the radio on the table and wait for the barn door to open. Kill the deranged Augers and the Froyo Guy. |
| 6 | Talk to Arwa to end the mission. |
A Call for Help Rewards
| Side Mission Rewards | |
|---|---|
| Base Reward |
・Cash ・XP ・Eridium |
| Equipment Reward | ・Shotgun (Green to Purple Rarity) |
Borderlands 4 Related Guides

List of Side Missions
Comment
Author

A Call for Help Walkthrough
Rankings
- We could not find the message board you were looking for.
Gaming News


Popular Games

Genshin Impact Walkthrough & Guides Wiki
Hollow Knight: Silksong Walkthrough & Guides Wiki
Umamusume: Pretty Derby Walkthrough & Guides Wiki
Borderlands 4 Walkthrough & Guides Wiki
Wuthering Waves Walkthrough & Guides Wiki
Honkai: Star Rail Walkthrough & Guides Wiki
Pokemon TCG Pocket (PTCGP) Strategies & Guides Wiki
Pokemon Scarlet and Violet (SV) Walkthrough & Guides Wiki
Zenless Zone Zero Walkthrough & Guides Wiki
Clair Obscur: Expedition 33 Walkthrough & Guides Wiki


Recommended Games
Once Human Walkthrough & Guides Wiki
Fire Emblem Heroes (FEH) Walkthrough & Guides Wiki
Yu-Gi-Oh! Master Duel Walkthrough & Guides Wiki
Persona 3 Reload Walkthrough & Guides Wiki
Black Myth: Wukong Walkthrough & Guides Wiki
The Legend of Zelda: Tears of the Kingdom Walkthrough & Guides Wiki
Super Smash Bros. Ultimate Walkthrough & Guides Wiki
Monster Hunter World Walkthrough & Guides Wiki
Diablo 4: Vessel of Hatred Walkthrough & Guides Wiki
Elden Ring Shadow of the Erdtree Walkthrough & Guides Wiki


All rights reserved
©2025 Gearbox Software. Published by 2K Games. Developed by Gearbox. Gearbox, Borderlands, and related logos are all trademarks of Gearbox Software, LLC. 2K and the 2K logo are trademarks of Take-Two Interactive Software, Inc. All other marks and trademarks are the property of their respective owners. All rights reserved.
The copyrights of videos of games used in our content and other intellectual property rights belong to the provider of the game.
The contents we provide on this site were created personally by members of the Game8 editorial department.
We refuse the right to reuse or repost content taken without our permission such as data or images to other sites.